Showing posts with label Summery Fun. Show all posts

Thursday, January 17, 2013

How to Upcycle and old Men's Shirt into a baby Sleepsack


When my first little guy was born I had a few sleep sacks, this was great, being a winter baby, the warmth was good once he got too big for the swaddling wraps. …but then summer came and I found, even though it was too hot for it, he wasn’t keen to sleep without it.

So I found an old shirt my brother was getting rid of and turned it into a summer weight sleeping bag.  It just reminded him that it was time for sleeping and not to try climbing around the cot and so on.  Even now my 2 yr old wears one even though he is in a bed, they get pretty savvy at being able walk in sleepsacks! 

I will have to make a new one, using a shirt my husband doesn’t need anymore…well I don’t think he does anyway… So that I can show you the steps in photos.

Step One: - Find shirt, I think a reasonably big sized one works best so that you have enough room to play around with and it doesn’t become a tight fitting piece


Step 2: Cut off collar and sleeves, Cut just below seam…if you wanted to be really fancy and neat and beautiful you could unpick it…but not me, I don’t think it would make enough difference…. if any… to bother with that.


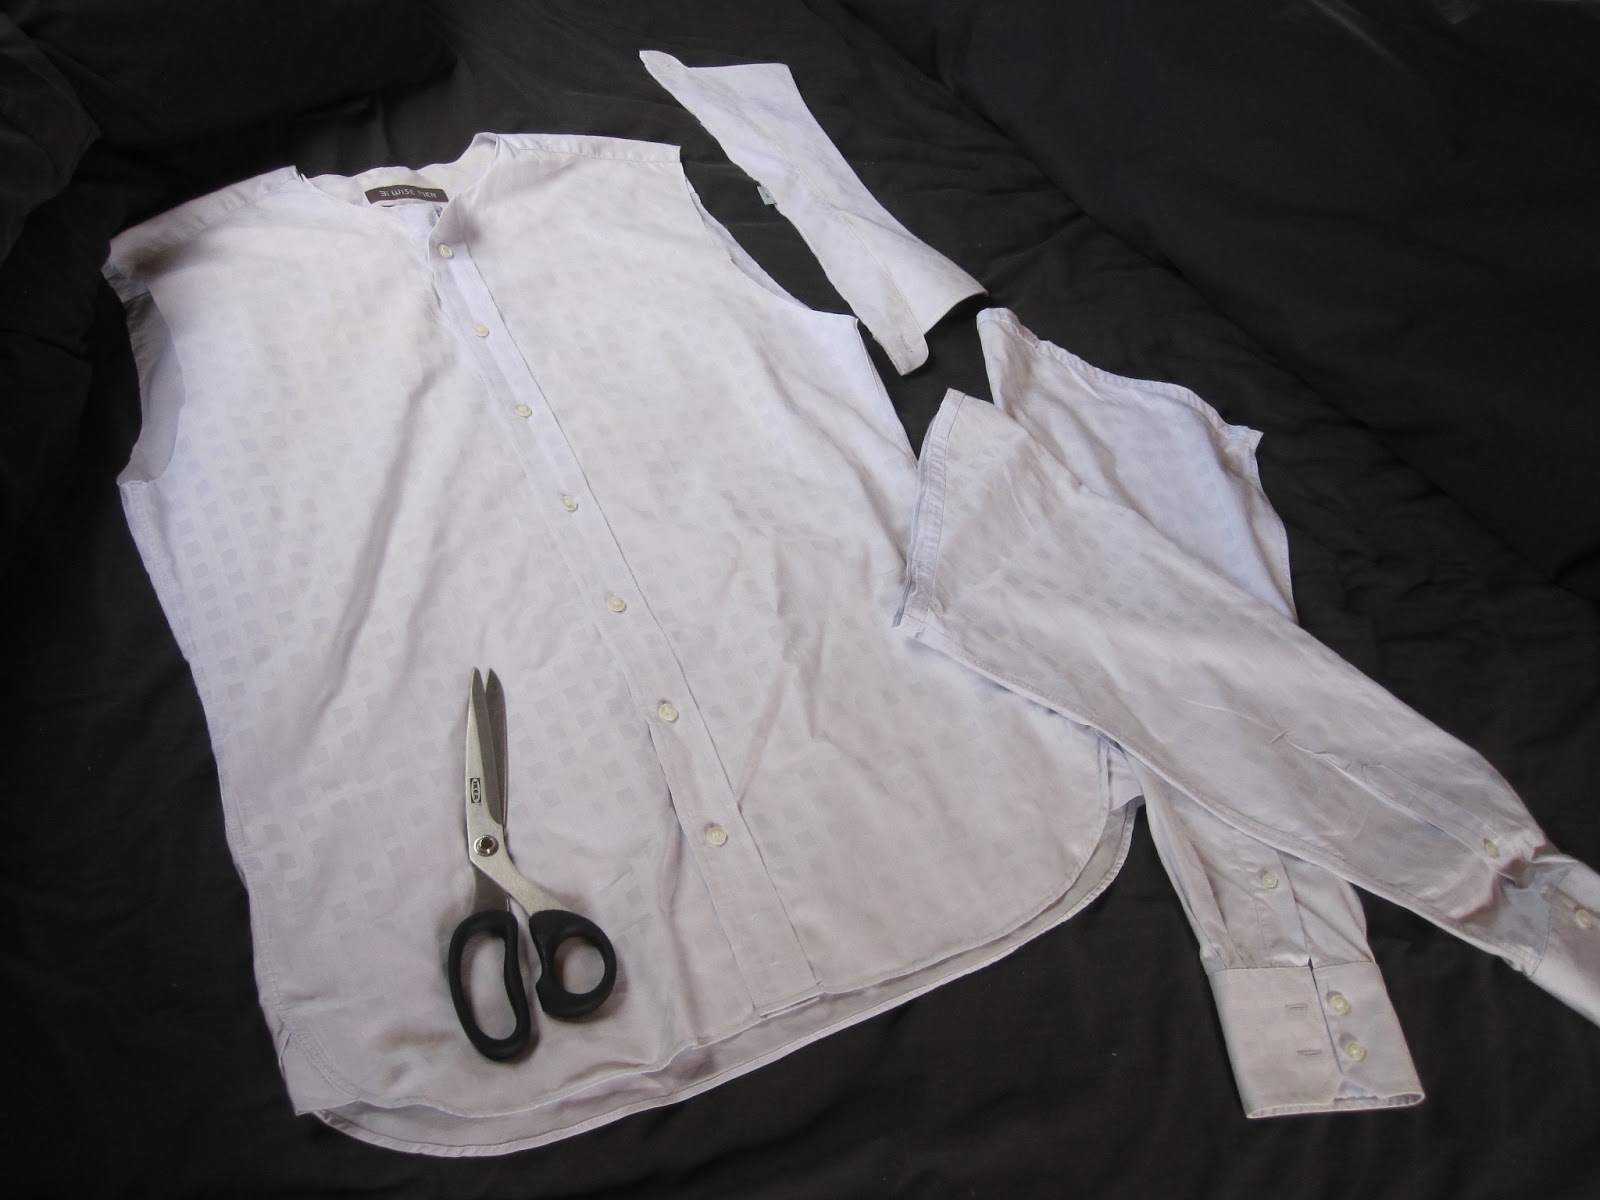
Step 3: Cut down seam and through cuff of one of the sleeves.  This is to sew on to the bottom of the shirt to give it a little more length. 


Step 4:  Sew up the opening in the sleeve where the buttons are.


Step 5: Button up shirt and sew the bottom closed up about 5cm from the bottom, I did the first one up to just above the bottom button which works fine too, but maybe you would get the legs in easier with a little more room.
Sew the end of the sleeve cuff closed (right sides together)


Step 6: Turn shirt inside out and with right sides together join the sides of the sleeve to the bottom of the shirt.  You’ll end up with over lap where the sleeve was shorter than the width of the shirt.   (Or if you wanted it different, you could try cutting along the top of the sleeve (not where the seam is) then the sleeve will be longer that the shirt width, may make it easier…may not?


Step 6a - I forgot about doing this until I tried it on my little guy for the photo session.  While you do need a big shirt to get the length best, the width ends up being quite over the top, so I took the shoulders up a bit and the sides under the armholes in a bit, I am adding this step in now, because this is the best point the it should be done, but my photos are showing how I did it at the end so the seams were already finished and turned back.  Just take a chunk...about 3 cm from shoulder, and the same, 3 or 4cm from the armhole and taper off to the side seam


Step 7 – Sew up top of sleeve to meet the seam at the hem of the shirt, make it blend in as neatly as possible!  It can only come out wonky, but that is all part of the upcycling charm I say!


Step 8 Finishing off – Overlock/zigzag the top of the sleeve part that you just sewed in step 7, and neaten up the neck and the armholes, I think I will just overlock and turn mine under, but you could bind them, maybe cut a strip on a slight bias from the left over sleeve or buy a co-ordination bias binding.  Whatever tickles your fancy!

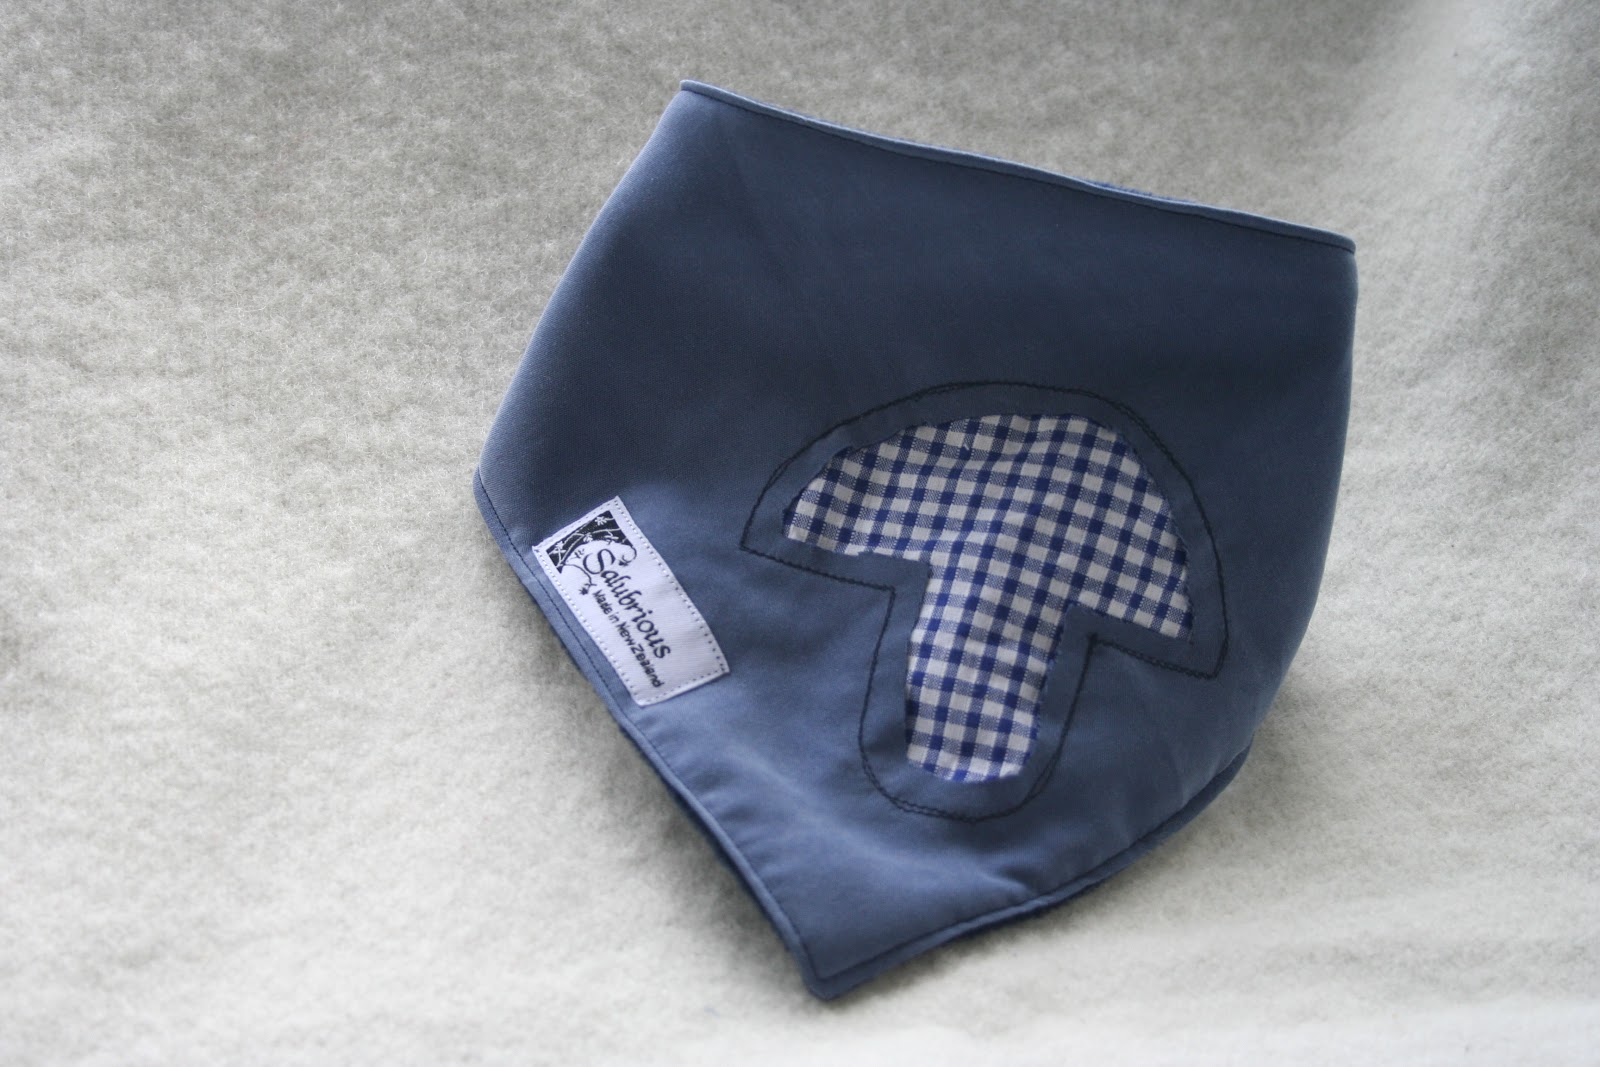
And I’ll just finish off with a couple more shots of my little one in the finished products, the original mostly though, because I have more cute ones of him in that! J


(The above 2 shots are before I took up the shoulders and took in the armhole, the one on the left is after i did that)


Check out the hand in the breast pocket!!  


I’d love to hear from you, let me know if any of this is confusing or you get lost somewhere….or even better if you had a great success with it!  Post a photo on my Facebook page of your finished product.  

Monday, January 14, 2013

Back from Holiday

Hello all my thousands of followers!?!?!
 I am back after a unintentionally long break!  It just got so busy and hectic and as the whole blogging thing is still so new to me, it takes a lot of concentration to get anything written!  So Christmas was looming, Christmas Wonderland was even closer....
....check out the Connections tree!  (Connections Facebook page link)  Connections is a little craft group we do during the term, come along and play!....so anyway...Christmas Wonderland came...and finished...Christmas came... 

...and went and then we went away camping 


....for just over 2 weeks. 


 I have decided to try posting a photo a day on facebook, so check out my facebook page Facebook page link to see how my life pans out this year!!

I will work at sticking to the schedual here that i laid out earlier, but as a new years resolution I am going to try to do more entries... tommorrow I am going to be working on photographing a DIY entry...a project I made ages ago, but i think it is a great idea, so I might start marketing them!!  
So see you around in 2013, a great year for business eh?
by the way, I have re-opened my online shops so remember to check for new stock

Thursday, November 1, 2012

A few of my favourite things...or should I say pins


My favourite pins….Well I spend FAR too much time on pinterest.
(check out Bacon Wrapped Media for more funny quotes!)
 

In fact I was trying to “surf pinterest” , as I wrote this, but we had no internet…so I could only stick to one page, and try and remember what it opened too!

So, you would think I could find a few good things to share with you…AND I have. 
First up, a recipe…actually 2 recipes.

The first is something that I just made last night

Here is a picture of what it looked like when I made it myself!!  Not too bad really

The recipe is from  Cook Lisa Cook

I was writing thing post before I actually made it and I wondered how it would go down as my husband has recently informed me that he’s not a huge fan of the “potato only meals” But me and the kids love to have Wedges with salsa, cheese, bacon and sour cream as a full dinner, so I wonder if adding the chicken and more sauciness will help…or just take it over the top.  Sometimes I find these pinterest recipes end up being a bit to….ummmm….what can I say…’Americanised’.  Sorry Americans, it’s not you, it’s me…ummmm….lets just be friends?....
So anyway, it was good, a little too oily, but that's easy enough to fix, and I didnt put as much chicken as she said to beacuse I am a real stinge...I probably should have, it was fine, but it wouldnt have been better with more chicken!


And my 2nd recipe is this super divine Cinnabon Roll bake cake dish thingy!!  WOW…. It was so yum.  I made it to impress a couple of friends who came over to do crafts with me one day!  They were impressed, so it worked…but even better than that, they didn’t eat it all and I froze it in parts and my husband and I had yummy desserts for ages afterwards!!  Only changes I would make, is a little less sugar and a little less topping….but then again, if I did that I might end up eating even more in each sitting! So maybe it’s not all bad!?!?

unfortunately I didnt take a picture of my own one when I made it, but here is a picture of what inpired me to pin it...and then make it!
 

This recipe comes from Six Sisters Stuff, (I have a tonne of pins from that blog, it’s quite amazing…wow, what would it be like to have 5 sisters!  I don’t have any, and I married a guy with 3 brothers…I have lots of sisters-in-law now though, so that’s good!!)  Six Sisters website


And the other 2 pins are things for the kids.


This is a gorgeous little tutorial for turning an adult’s tee into a preschooler’s dress!  I made this for my daughter


And then got so inspired that I made another random dress from a t-shirt for her


And another


And finally a cool idea for the Father’s Day prezzie


And here is the pictures we gave to Dad for 2012!


Each year we take a shot of the kids displaying how much they love their dad…print it out for 19c a photo and either buy a beautiful frame from the dollar store….or re-use last year’s frame!!


Check out Melissa Speelman's website for some great photography inspiration…or get her to do take you pics!!


So that was a few of my favourite things this week, head over here and follow me on pinterest too! J  Salubrious on Pinterest


Do you love pinterest as much as I do????


Tuesday, October 23, 2012

35% off all items on Etsy.com


So the first promotion blog!  What to do? 

Well, I think I will start with a 35% off special on any items bought through the etsy shop at:  http://www.etsy.com/shop/salubrious

Just enter this code to take advantage of the special until the end of November.

BLOGSPECIAL35

Watch out for new items added all the time!
 
Below items are all now available.  Get in quick for Christmas before the stock runs out!!  :)
Dribble Bibs for girls


and dribble bibs for boys


Plenty of Nappy wallet colours and styles to choose from
 

Portable High Chairs, perfect for summer camping or for taking out to all the christmas parties
 

Little girl's capelet, wel everyone needs a capelet!!
 

Lace and floral headbands
 

And frilly aprons (with lots more designs coming!!)
 
So keep watching for more items being added to the shop.  Get in before the end of November to get the discount, but get in earlier to ensure it gets to you in time for Christmas, remember everything is hand made and made to order!
 
....Note to self....need to do more research on techniques for self promotion through one's blog...also, dont try to write blog post material while watching The Office on DVD!!  :)

What's your favourite item???

Wednesday, November 17, 2010

New Stuff for Summer

Well I've been working on some new items and so far have a nappy bag, a mkae-up purse and a gorgeous sock monkey listed on Etsy and on Felt.  I think they are great.  I hope you do too.

Now my next goal is to get some cool sleeveless shirts on there and some shorts to go with them, as well as some glove pooches to befriend the sock monkeys!

The summer sun is tempting me outside into the garden.... but the UV rays are reminding me to stay indoors and enjoy the sun from inside!!

Well enough time wasted on the computer, I better get sewing ... oh it's 1.30, first I'll feed the baby...THEN I will sew!