Showing posts with label kids. Show all posts

Thursday, January 17, 2013

How to Upcycle and old Men's Shirt into a baby Sleepsack


When my first little guy was born I had a few sleep sacks, this was great, being a winter baby, the warmth was good once he got too big for the swaddling wraps. …but then summer came and I found, even though it was too hot for it, he wasn’t keen to sleep without it.

So I found an old shirt my brother was getting rid of and turned it into a summer weight sleeping bag.  It just reminded him that it was time for sleeping and not to try climbing around the cot and so on.  Even now my 2 yr old wears one even though he is in a bed, they get pretty savvy at being able walk in sleepsacks! 

I will have to make a new one, using a shirt my husband doesn’t need anymore…well I don’t think he does anyway… So that I can show you the steps in photos.

Step One: - Find shirt, I think a reasonably big sized one works best so that you have enough room to play around with and it doesn’t become a tight fitting piece


Step 2: Cut off collar and sleeves, Cut just below seam…if you wanted to be really fancy and neat and beautiful you could unpick it…but not me, I don’t think it would make enough difference…. if any… to bother with that.
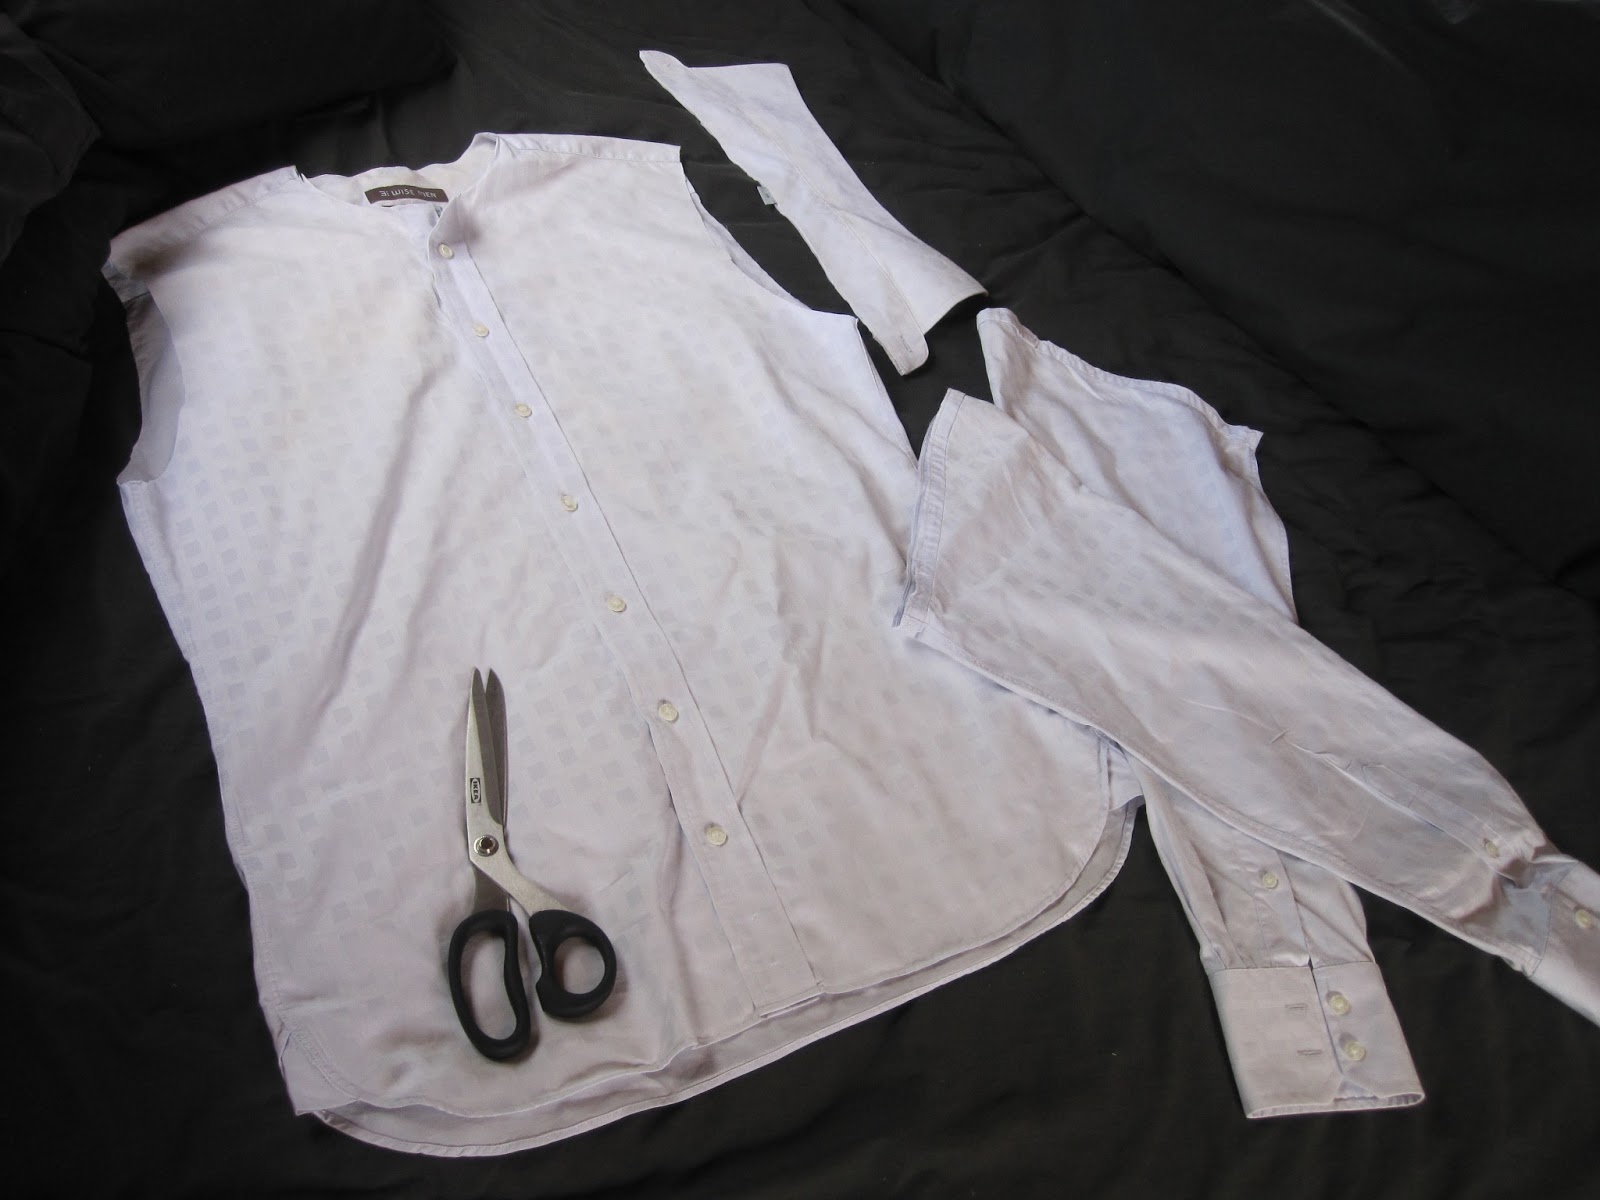

Step 3: Cut down seam and through cuff of one of the sleeves.  This is to sew on to the bottom of the shirt to give it a little more length. 


Step 4:  Sew up the opening in the sleeve where the buttons are.


Step 5: Button up shirt and sew the bottom closed up about 5cm from the bottom, I did the first one up to just above the bottom button which works fine too, but maybe you would get the legs in easier with a little more room.
Sew the end of the sleeve cuff closed (right sides together)


Step 6: Turn shirt inside out and with right sides together join the sides of the sleeve to the bottom of the shirt.  You’ll end up with over lap where the sleeve was shorter than the width of the shirt.   (Or if you wanted it different, you could try cutting along the top of the sleeve (not where the seam is) then the sleeve will be longer that the shirt width, may make it easier…may not?


Step 6a - I forgot about doing this until I tried it on my little guy for the photo session.  While you do need a big shirt to get the length best, the width ends up being quite over the top, so I took the shoulders up a bit and the sides under the armholes in a bit, I am adding this step in now, because this is the best point the it should be done, but my photos are showing how I did it at the end so the seams were already finished and turned back.  Just take a chunk...about 3 cm from shoulder, and the same, 3 or 4cm from the armhole and taper off to the side seam


Step 7 – Sew up top of sleeve to meet the seam at the hem of the shirt, make it blend in as neatly as possible!  It can only come out wonky, but that is all part of the upcycling charm I say!


Step 8 Finishing off – Overlock/zigzag the top of the sleeve part that you just sewed in step 7, and neaten up the neck and the armholes, I think I will just overlock and turn mine under, but you could bind them, maybe cut a strip on a slight bias from the left over sleeve or buy a co-ordination bias binding.  Whatever tickles your fancy!

And I’ll just finish off with a couple more shots of my little one in the finished products, the original mostly though, because I have more cute ones of him in that! J


(The above 2 shots are before I took up the shoulders and took in the armhole, the one on the left is after i did that)


Check out the hand in the breast pocket!!  


I’d love to hear from you, let me know if any of this is confusing or you get lost somewhere….or even better if you had a great success with it!  Post a photo on my Facebook page of your finished product.  

Monday, January 14, 2013

Back from Holiday

Hello all my thousands of followers!?!?!
 I am back after a unintentionally long break!  It just got so busy and hectic and as the whole blogging thing is still so new to me, it takes a lot of concentration to get anything written!  So Christmas was looming, Christmas Wonderland was even closer....
....check out the Connections tree!  (Connections Facebook page link)  Connections is a little craft group we do during the term, come along and play!....so anyway...Christmas Wonderland came...and finished...Christmas came... 

...and went and then we went away camping 


....for just over 2 weeks. 


 I have decided to try posting a photo a day on facebook, so check out my facebook page Facebook page link to see how my life pans out this year!!

I will work at sticking to the schedual here that i laid out earlier, but as a new years resolution I am going to try to do more entries... tommorrow I am going to be working on photographing a DIY entry...a project I made ages ago, but i think it is a great idea, so I might start marketing them!!  
So see you around in 2013, a great year for business eh?
by the way, I have re-opened my online shops so remember to check for new stock

Tuesday, October 23, 2012

35% off all items on Etsy.com


So the first promotion blog!  What to do? 

Well, I think I will start with a 35% off special on any items bought through the etsy shop at:  http://www.etsy.com/shop/salubrious

Just enter this code to take advantage of the special until the end of November.

BLOGSPECIAL35

Watch out for new items added all the time!
 
Below items are all now available.  Get in quick for Christmas before the stock runs out!!  :)
Dribble Bibs for girls


and dribble bibs for boys


Plenty of Nappy wallet colours and styles to choose from
 

Portable High Chairs, perfect for summer camping or for taking out to all the christmas parties
 

Little girl's capelet, wel everyone needs a capelet!!
 

Lace and floral headbands
 

And frilly aprons (with lots more designs coming!!)
 
So keep watching for more items being added to the shop.  Get in before the end of November to get the discount, but get in earlier to ensure it gets to you in time for Christmas, remember everything is hand made and made to order!
 
....Note to self....need to do more research on techniques for self promotion through one's blog...also, dont try to write blog post material while watching The Office on DVD!!  :)

What's your favourite item???

Tuesday, October 16, 2012

What to do with the kids during the school holidays


First we had one for Little Miss Four – I just had this urge and thought, ‘there are just too many fun ideas for parties on pinterest to wait a whole year for another birthday!’

We invited five friends (because we have six seats at the table!) and had two organised activities, lunch and a back-up DVD!!

The table was set up with paper and pencils for drawing when the kids arrived, although the other toys lying around were more popular!

Activity 1…. Decorating crowns
 
I cut "crown shapes" out of ceral boxes and put out glitter, beads,flowers etc. to decorated with. This kept them occupied for about 30 minutes (anyone bored just went back to the other toys).


Activity 2…. Cupcake decorating


The kids had all now moved away from the crown making activity, so I set up cupcake decorating.  Brilliant! They especially lived the marshmallows and chocolate buttons - most didnt make it on to the cupcakes!! We decided everyone should do one for their mums too – mostly because it wasn’t really taking as long as I’d hoped!

Lunch time – and eating the cupcakes!

Somehow this all panned out smoothly until about 1.30, when the parents arrived.

Just before 1.30 I did put on the DVD, but just because my daughter really wanted to show her friends the DVD we borrowed from the library!!

No real costs for this; I bought some sprinkles and a couple of ingredients for the lunch, but mostly I just pulled things out of my craft cupboard for the crowns, and out of my pantry for the cupcakes.  And of course the $2.50 rental fee from the library (a more advanced planner would have gone on $1 rental day!!)


Mr Six’s party was postponed a week initially because six out of the five friends he was allowed to invite couldn’t come (that's backups too!!)! In the end five made it.

Boys are quite different from girls – I am so thankful it wasn’t raining! They played a lot of tag and a lot of something in the playhouse/fort, which fit in with my “stay outside until the next activity is ready” approach!

Activity 1…. Make your own pizza.


It was hard to NOT get involved – kids really don’t make good pizzas!! But I didn’t intervene and when it came time to eat them, the kids all scoffed them down!!  (And no sicknesses since!)

They were having so much fun outside I quietly asked my son if he still wanted to do the next activity. He did, and they all thought they could sit still and be quiet long enough, so…

Activity 2 – Mr Six doing an “Origami Jumping Frog Demo”

Probably a bit beyond most (all) of the kids, but they still seemed to enjoy it and proudly showed their parents. I did intervene with the frogs, just to keep them all on track. It seems my boy is quite the origami guru, and his idea of an “easy one, with only one hard bit” was not so easy!!

A bit more outside play and then, when they all seemed to be drifting inside, I offered up the DVD, pressing play just as the first mother arrived!!

Again, very low costs. Homemade pita bases, tin of pasta sauce, bacon, cheese, pineapple, random vegetables to keep it interesting and BBQ sauce for the “swirls” on top! Origami paper was just printer paper pre-cut into squares!

Successful Holiday Parties/Mass Play Dates – Check


Any ideas on what I can do next holidays?? ha